Hey everyone, if you’ve ever walked through a manufacturing floor or a quality control lab, you’ve probably seen a big, boxy machine with a screen humming away, a tech in a lab coat scribbling numbers next to it, and wondered, “What the heck is that, and why does it matter so much?” I get it—when I first started in this industry 12 years ago, I’d stare at testing instruments like they were some kind of magic box that spits out perfect pass/fail results. Turns out, there’s no magic involved, just solid science (and a lot of tiny, precise parts working together). Today, I wanna break down how one of the most common workhorses in our lineup—our universal testing machine (UTM)—actually works, since it’s the backbone for testing everything from plastic water bottles to aircraft parts. Testing Instrument
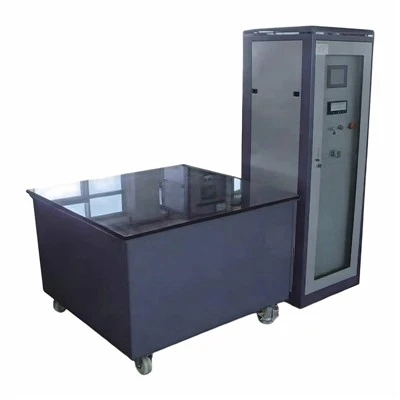
First off, let’s cut the jargon. A UTM’s whole job is to measure how a material behaves when you pull, push, twist, or bend it. No matter if you’re testing a new type of rubber for shoe soles, a metal bolt for construction, or even a fabric for backpacks, it’s all about quantifying that “behavior” with two key numbers: force (how hard you’re pushing or pulling) and displacement (how much the material moves or stretches before it breaks). That’s it. The science behind it boils down to three main parts: the loading frame, the force measurement system, and the control system. Let’s start with the frame because that’s the part that holds everything steady. You can’t get accurate results if the machine itself is wobbly, right? So our UTMs have a rigid steel frame—think of it like a super heavy-duty bookshelf that never sags. The top part is fixed, and the bottom part has a movable crosshead that slides up and down on precision rails. We’re talking tolerances so tight, if you tried to stick a piece of paper between the crosshead and the rail, it’d have to be thinner than a human hair. No play, no flex, no funny business that would throw off the numbers. That’s non-negotiable for us—we’ve had customers say, “Our old UTM would give different results if we loaded it on a hot or cold day” and that’s exactly why we build the frame with reinforced steel that’s temperature-stabilized.
Next, the force system. This is the brain of the operation, basically. Most UTMs use either a hydraulic system or an electromechanical system to apply force, and I’m gonna focus on the electromechanical ones because they’re the most popular for small to mid-sized shops (and they’re what we sell most of, honestly). Hydraulics are great for super heavy loads—like testing 10-ton steel beams—but they leak sometimes, need more maintenance, and can be a pain to calibrate. Electromechanical ones use a precision screw (a ball screw, to be exact—those are the same screws used in high-end CNC machines) that’s turned by a servo motor. The motor spins the screw, which moves the crosshead up or down, and that’s what applies the pulling or pushing force. But wait, how do you measure exactly how much force you’re applying? That’s where the load cell comes in. A load cell is a tiny, super sensitive sensor mounted right where the jaws hold the sample (like, on the crosshead or the grip itself). It’s basically a metal block with strain gauges glued to it. Strain gauges are the magic here—they’re made of a thin metal foil that changes shape when force is applied. When you pull or push on the load cell, the foil stretches or compresses, which changes its electrical resistance. The control system measures that tiny change in resistance (it’s like a millionth of a volt, seriously) and turns it into a force reading in pounds, newtons, whatever unit the user wants. That’s why load cells have to be calibrated every few months—if the foil gets bent or dirty, the resistance reading is off, and your force numbers are garbage. We send a calibration certificate with every UTM we sell, so customers know it’s ready to use right out of the box.
Then there’s the displacement measurement part. That’s how you know how much the sample is stretching. You can’t just rely on the crosshead’s movement, because sometimes the sample slips in the jaws, or the crosshead flexes a tiny bit, so you need a direct measurement on the sample itself. That’s where an extensometer comes in. An extensometer is a little clip-on device that has two prongs you attach to the sample, usually an inch or two apart. It measures how far apart the prongs move as the sample stretches. Just like the load cell, it has strain gauges that turn movement into an electrical signal. For really small stretches—like testing a thin plastic film that only stretches a fraction of a millimeter before breaking—we use a laser extensometer instead, which touches the sample at all, so you don’t damage tiny, fragile materials. That’s a game-changer for industries like electronics, where they test super thin copper wires or circuit board materials.
Now, let’s talk about the control system, because all these parts need to work together seamlessly. The control system is basically the computer or the touchscreen on the UTM, and it runs on specialized software. You input what test you wanna do—say, a tensile test on a piece of PET plastic for water bottles—set the crosshead speed (usually 1 inch per minute for plastics), and tell it when to stop: when the sample breaks, or when it reaches a certain force limit. The software sends a signal to the servo motor, which spins the screw, moves the crosshead, and applies force. At the same time, it’s reading real-time data from the load cell and extensometer, plotting a graph of force vs. displacement on the screen, and storing all the numbers. That graph is what gives you the key properties: ultimate tensile strength (the maximum force before breaking), yield strength (when the material stops stretching elastically and starts deforming permanently), and elongation at break (how much it stretched before breaking, as a percentage of its original length). For example, if you test a plastic grocery bag, you’d want it to have high elongation so it doesn’t break when you load it with groceries, but low enough strength that it’s easy to tear when you need to.
Wait, let’s make this relatable with an example. Last month, a customer of ours—a small food packaging company—called us panicking because their old UTM was giving inconsistent results for their new cornstarch-based packaging. They were supposed to roll out a new eco-friendly line, but their quality team couldn’t tell if the cornstarch plastic was strong enough to hold 2 pounds of veggies. We sent a tech out with a portable UTM (yeah, we sell those too, for field testing) and walked them through the basics. We did a tensile test: clamped a 1-inch wide strip of their cornstarch plastic in the jaws, set the crosshead to move at 0.5 inches per minute, and watched the graph. The load cell told us the peak force was 120 newtons, which is exactly what they needed—strong enough, and the elongation was 30%, which meant it wouldn’t snap if someone dropped the package. Their old machine’s issue was that the load cell was calibrated wrong, so it was reading 85 newtons, making them think the plastic was too weak. That’s why calibration and accurate sensors matter—bad data leads to bad decisions, and bad decisions lead to wasted product, delays, or even safety issues.
Now, you might be thinking, “Okay, that’s a UTM, but what about other testing instruments we make, like the impact tester for car parts?” Let’s keep it simple, because I know I just dumped a lot of info on UTMs. An impact tester is all about how a material behaves when it gets hit really hard, like a car door hitting a pole. Instead of pulling or pushing, it uses a heavy pendulum that swings down and hits the sample. The pendulum has a known weight, so when you let it go from a set height, you calculate how much energy it uses to break the sample. The difference between the energy before the swing and after is the energy the sample absorbed. That’s why crash test dummies work too—they’re testing how the car’s materials absorb impact energy to keep people safe. Same science, different setup, but the core is measuring force, energy, and how the material reacts to that force.
A common question we get is, “Why does this matter for my business?” Small businesses often think testing instruments are just for big companies with fancy labs, but that’s not true. If you’re a furniture maker, you need to test how much weight a chair leg can hold before it breaks. If you’re a baker, you need to test how much dough a new flour can stretch before it tears (yeah, we have dough testing fixtures for UTMs). If you’re a jewelry maker, you need to test how soft a new metal alloy is before you make rings. Every industry relies on these instruments to make sure their products are safe, consistent, and meet regulations. The last thing you want is a batch of new phone cases that break when someone drops their phone, or a construction nail that snaps when you hammer it. Testing instruments take the guesswork out of making things, and that’s why we’re proud to supply them.
As someone who’s been in this game for over a decade, I’ve seen first-hand how technology has changed these instruments. When I started, UTMs had clunky dials and you had to calculate the graph manually with a ruler and pencil. Now, everything is digital, you can save test results to the cloud, share them with your team in seconds, and even run automated tests for hundreds of samples in a row without a tech sitting there the whole time. We also make sure our instruments are compatible with all the latest industry standards—like ASTM, ISO, and EU regulations—so you don’t have to spend hours adjusting settings to meet requirements. That’s our job: to build reliable, easy-to-use testing gear that works for you, not against you.
If you’re thinking about upgrading your testing equipment, or you’re tired of inconsistent results from your old machine, I’d encourage you to reach out. Whether you’re a one-person shop testing hand tools or a large factory needing a full lab setup, we can help you pick the right instrument for your needs. We don’t do one-size-fits-all—every customer’s testing is different, so we tailor our recommendations to your products, your budget, and your timeline. No pushy sales pitches, no hidden fees, just honest advice and quality gear that’s built to last. You can chat with our team, ask questions, even request a demo if you want to see a machine in action before you buy.
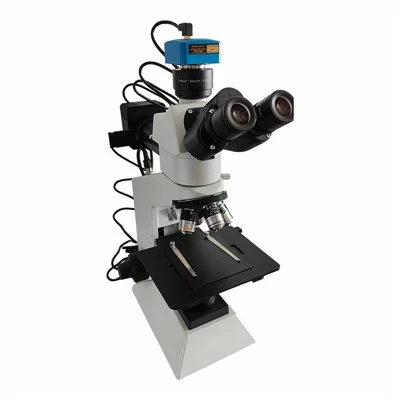
At the end of the day, testing instruments aren’t just fancy boxes with screens—they’re the backbone of quality manufacturing. They turn ideas into real, safe products, and they help businesses trust that every part they make is the same as the last. It’s science, it’s precision, and it’s what we care about most. If you have any questions about how testing instruments work, or you’re ready to talk about getting a new one for your team, don’t hesitate to connect. We’re here to help.
Construction Material Testing Equipment References:
- ASTM International. (2023). Standard Test Methods for Tensile Properties of Plastics.
- ISO 527-1:2019. Plastics — Determination of tensile properties — Part 1: General principles.
- Hough, D. B. (2021). Universal Testing Machines: A Practical Guide to Selection, Operation, and Maintenance.
- Instrumentation and Control Systems. (2022). Strain Gauges and Load Cells: Principles and Applications.
Hebei Wanluda Testing Instrument Equipment Co., Ltd.
As one of the most professional testing instrument manufacturers and suppliers in China, we have world-leading production equipment and strong manufacturing capabilities. Please rest assured to buy advanced testing instrument made in China here from our factory.
Address: Zhouguantun Village, Xian County, Cangzhou City, Hebei Province, P.R.China
E-mail: wldinstrument@163.com
WebSite: https://www.wldinstrument.com/
